Showing posts with label Dessert Recipes. Show all posts

Saturday, November 10, 2012

Caramel Apple Cheesecake Pie

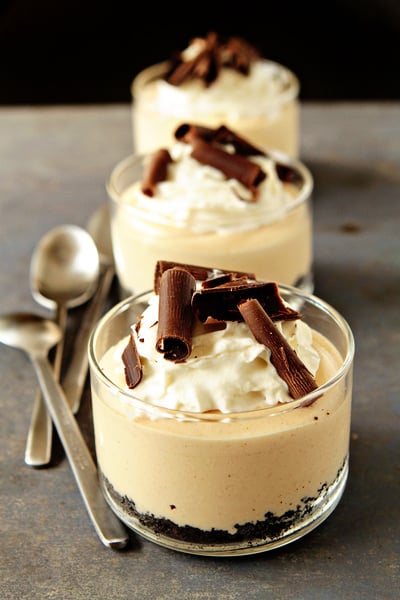
Original Recipe (this is my photo)

Another show stopper from Annie's Eats, my favorite food blog.  I submitted this in my office's "apple recipe" competition and won.  Everyone thought it was to die for.  It better be because it was a lot of work and it is an expensive recipe!  My notes say:  make more crust (1 and a half times), more cheesecake filling (1 and a half), and less nuts (half); I left the original recipe intact below.


Caramel Apple Cheesecake Pie
Serves:  16
Approx. 410 calories per serving


CRUST
APPLE FILLING
CHEESECAKE FILLING
TOPPING
To make the crust, preheat the oven to 375° F. Line the bottom of a 9-inch round springform pan with parchment paper. In a medium mixing bowl, combine the graham cracker crumbs, sugar, cinnamon and melted butter. Toss with a fork until all the crumbs are moistened and the ingredients are evenly mixed. Transfer the mixture to the prepared springform pan and press the crumbs in an even layer over the pan bottom and about half to two-thirds of the way up the sides of the pan. Bake for 6-8 minutes, until golden in color. Let cool for about 10 minutes. Pour a layer of caramel into the bottom of the crust and sprinkle evenly with the chopped pecans. Refrigerate the crust while you prepare the filling.

To make the apple filling, melt the butter in a large skillet over medium heat. Mix in the brown sugar, salt and cinnamon and cook for 1 minute, until bubbling. Mix in the apple slices and toss well to coat. Cook over medium to medium-high heat until tender and most of the liquid has been reduced, about 15-20 minutes. Let cool for a few minutes and pour into the prepared pie shell. Set aside.

Reduce the heat of the oven to 350° F. To make the cheesecake layer, combine the cream cheese and sugar in the bowl of an electric mixer and beat on medium speed until smooth, about 1 minute. Mix in the vanilla, egg and lemon juice until fully incorporated and smooth, 1-2 minutes. Spread the cheesecake filling into an even layer over the top of the cooked apples in the crust. Bake until a knife inserted in the center comes out clean, about 30 minutes. Remove from the oven, transfer to a wire rack and let cool to room temperature. Refrigerate for at least 4 hours.

To serve, carefully remove the sides of the springform pan. In the bowl of an electric mixer fitted with the whisk attachment, beat the heavy cream and confectioners’ sugar on medium-high speed until stiff peaks form (being careful not to overbeat.) Spread gently over the top of the chilled cheesecake layer. Top with dollops of caramel sauce and swirl with a knife to create a marbled effect. Sprinkle with a handful of chopped pecans if desired. Slice with a long, thin knife to serve.

Orange Creamsicle Cookies


I made these for a cookie contest at work and tied for first place.  Everyone really like them and they are just different enough to be interesting.  I thought the batter was a little dry so I added a couple squeezes of juice from the orange.  I think next time I would add a little more orange zest (I just did 2 whole oranges worth, didn't measure out 2Tb).


Orange Creamsicle Cookies
Yield: 36 small cookies
Approx. 150 calories per cookie


2 1/2 cups all purpose flour
3/4 teaspoon baking soda
1/2 teaspoon salt
1 cup (2 sticks) butter, softened
1/2 cup sugar
1/2 firmly packed brown sugar
1 large egg
1 teaspoon vanilla extract
2 tablespoons orange zest (for me that was the zest of 2 oranges)
2 cups white chocolate chips


Preheat oven to 375 degrees.

In a small bowl, combine flour, baking soda, and salt; set aside.

In a large bowl, cream butter and sugars until light and creamy. Beat in egg and vanilla until smooth. Gradually add flour mixture until combined. Stir in orange zest and white chocolate chips.
Drop rounded teaspoonfuls onto ungreased cookie sheets. Do not flatten cookies; it will make them dry. Bake 8 – 10 minutes or until golden brown around edges. Do not overcook! Cookies will be plump. Cool for several minutes on cookie sheets before transferring to rack to cool completely. Store in airtight container.


Biscoff No Bake Cheesecake


Yep, you read that right.  These are reallllly good.  I made them in tiny little cups for work and everyone just loved them.  I made 2 batches and it made 30 little cups that were a couple bites each, and that was perfect.

Biscoff No Bake Cheesecake 
Yield:  6+
Approx. calories per serving

For the Crust
12 Biscoff cookies, crushed into crumbs
2 tablespoons unsalted butter, melted

For the Filling
1 (8 ounce) package cream cheese, softened
2/3 cup Biscoff Spread
1 teaspoon pure vanilla extract
1 (8 ounce) tub frozen whipped topping, thawed

For the Garnish
whipped topping, optional
Biscoff cookie crumbs, optional

1. In a medium bowl, stir together the Biscoff cookie crumbs and melted butter. Evenly divide the crumbs between your individual serving dishes and press into the bottoms of the dishes to form a crust layer.

2. In a large bowl, with an electric mixer, beat the cream cheese and Biscoff Spread on medium-high speed until smooth and creamy, about 3 minutes. Add vanilla and mix to combine. Using a rubber spatula, fold in the whipped topping until well blended and no streaks remain.

3. Evenly pipe or spoon the filling into individual serving dishes. Cover with plastic wrap and refrigerate for at least 2 hours before serving.

4. If desired, garnish with additional whipped topping and Biscoff cookie crumbs.


Saturday, March 31, 2012

Individual Peanut Butter Pies


I both hate and love this recipe.  It was easy and delicious... but sooo bad for you.  I think the serving size is a little on the large side due to the rich denseness of the peanut butter cream.  I am curious what would happen if the milk was halved and the whipped cream was doubled.  Also, my coworker volunteered to taste it and said it need more crust.  I cut this recipe in half and made 4 ramekins.  I ate only about half a ramekin each time.

Individual Peanut Butter Pies
Serves:  8
Calories:  About 765 each

Ingredients:
For the crust
16 Oreo cookies
4 tablespoons unsalted butter, melted
 
For the filling
1 cup heavy cream
8 ounces cream cheese
1 cup creamy-style peanut butter
1 cup confectioner's sugar
1 14-ounce can sweetened condensed milk
1 teaspoon vanilla extract
 
Directions:
1. Place the Oreo cookies into the bowl of a food processor and pulse into fine crumbs. In a small bowl, combine cookie crumbs and melted butter and stir.

2. Evenly divide the crumbs between your individual serving dishes and press into the bottoms of the dishes to form a crust layer.

2. In the bowl of a stand mixer fitted with the whisk attachment or in a large bowl with an electric mixer, beat the heavy cream until stiff peaks form. Transfer whipped cream to a small bowl and place it into the refrigerator while you prepare the rest of the filling.

3. Place cream cheese and peanut butter the mixing bowl and beat on medium speed until smooth. Reduce speed to low and gradually add in confectioners' sugar until well combined. Add in sweetened condensed milk and vanilla and beat on medium speed until mixture is creamy and smooth. Take care to scrape down the sides of the bowl as needed.

4. Stir in 1/3 of the whipped cream into the filling mixture. Use a rubber spatula to fold in the remaining whipped cream until well blended until no streaks remain.

3. Evenly pipe or spoon the filling into individual serving dishes. Cover with plastic wrap and refrigerate for at least 3 hours before serving. If desired, garnish with whipped cream and chocolate curls.

Wednesday, February 8, 2012

Thin Mint Truffles


These were more delicious than the lemon lime sugar cookie truffles, but there is an extra step to this with the 2 layers of dipping.  These were not worth the effort either.  I would absolutely rather just eat the cookies plain.  I doubled the recipe because 24 pieces is a waste of time to get all this junk out.  And I am lazy and didn't want to dirty my food processor so I put the cookies in a large ziploc bag and beat the crap out of them with a meat mallet =)

Thin Mint Truffles
Yield:  24 pieces
Calories:  About 165 per piece


1 box 9oz Box, Girl Scout Thin Mint Cookies  (Use Keebler grasshopper cookies, they are cheaper and way better anyway... they are 10 oz packages, so eat a few first)
4 ounces, weight Fat Free Cream Cheese, Slightly Softened
8 ounces, weight Guittard's Green Mint Chips  (I used Nestle's chocolate and mint chips because I had them)
8 ounces, weight White Chocolate Chips Or White Chocolate Bark  (I used Wilton candy melts in white with some green food coloring and dipped this second instead of first)

In a food processor, pulse the Thin Mints a few times, and then blend them down until they are just crumbs. It might be easier to do this in two batches.

Next, mix the cream cheese and cookie crumbs together in a bowl until well incorporated. Roll the mixture into 1 inch size balls, and place them on a wax paper covered baking sheet. Place the baking sheet in the fridge for about 30 minutes, so the balls are easier to dip in the chocolate and do not fall apart.

Once the truffles have been in the fridge for a while, melt the green mint chips in a double boiler or a microwave safe bowl in the microwave (if you use the microwave, heat the chips for 30 seconds at a time, stirring in between each heat burst). Roll half of the truffles in the green mint chocolate, and place them back on the wax paper.


Melt the white chocolate the same way as you melted the mint chips above. Then roll the remaining truffles in the melted white chocolate.
 
Once they have dried a little, place the remaining white chocolate in a small Ziplock bag and cut a tiny bit of one corner off the bag. Start small at first, then if you need, make the hole a little larger. Drizzle the white chocolate over the green truffles. Do the same with the remaining mint chocolate, drizzling it over the white truffles.

Place the baking sheet back in the fridge so that the chocolate can set.

Lemon-Lime Sugar Cookie Truffles


While tasty, these are too much work to be worth it.  The one thing I did get out of this recipe is that lemon and lime in sugar cookie batter is ridiculously awesome and you should stop there before all the cream cheese and chocolate.  But if you are a glutton for punishment, here is the recipe:

Lemon-Lime Sugar Cookie Truffles
Yield:  About 40 balls
Calories:  Approx. 150 per piece


1 batch of sugar cookie dough (I used a store-bought mix, but you can use any recipe you like!)
zest and juice of 1 large lemon and 1 large lime
1 1/2 blocks cream cheese (12 ounces) at room temperature
1 package white chocolate candy coating
colored sprinkles or coarse sugar, for garnish

Preheat oven to 350 degrees. Prepare the cookie dough as directed on package or recipe; add in the zest and juice of the lemon and lime and mix well. Spread the cookie dough in a greased 9×9 baking dish and bake for 30-40 minutes, or until cookies are fully baked. Cool completely.

When cookies are cooled, using your hands, remove from the dish and crumble into the bowl of a stand mixer or food processor (small chunks are fine). Add in the cream cheese and mix until the cookie crumbs and cream cheese are completely mixed together. Roll into 1-1 1/2 inch balls and refrigerate for at least 1 hour.

When the balls are thoroughly chilled, melt the white chocolate candy coating in the microwave, or over a double boiler. Carefully dip each ball into the white chocolate and turn to coat. Remove with a tooth pick and set on a cookie sheet lined with wax paper. Top with sprinkles. Repeat until all the balls are coated. Store in the refrigerator.

Friday, December 9, 2011

Cakies!


Mine, in lemon and triple chocolate fudge, all packaged up and ready to party


I changed the name of these, so what?  My blog, my rules.  (my name for the them.. get it?  Cake+Cookie=Cakie).  Anyway.  These are tasty and light.  Pretty easy to make too, I needed something to whip up for a party and I just happened to have all these ingredients.  This dough is very sticky.... so no, you didn't do it wrong.

Cakies
Yield:  3 dozen
Approx. 85 calories per cookie, depending on flavor

1 (8 ounce) container frozen whipped topping, thawed
2 eggs
1 (18.25 ounce) package lemon cake mix (or any flavor really)
1/3 cup confectioners' sugar for decoration

Preheat oven to 350 degrees.  Lightly grease baking sheets.

Beat together the whipped topping and eggs together. Add the cake mix and continue to mix. Dough will be sticky.  Refrigerate for 30 minutes.

Drop by teaspoonfuls into a bowl of confectioners' sugar and roll to coat. Place cookies on the prepared baking sheets. Bake  for 9-11 minutes.  Cool on racks.

Friday, October 9, 2009

Apple Crisp - 1


I love apple crisp, probably more than apple pie which is amazing. I plan on trying several apple crisp recipes in search of my favorite so I have labeled this one as apple crisp 1. This is a classic and super delicious. I cut the original recipe in half because I am the only one with a sweet tooth in this house and I didn't want to be a piggy and eat a huge pan (ok, well I WANTED to but I knew I shouldn't).


Apple Crisp 1
Serves: 6

5 cups all-purpose apples, peeled, cored and sliced (I used Jonamac... select something tart for a good baking apple)
1/2 cup white sugar
1-1/2 teaspoons all-purpose flour
1/2 teaspoon ground cinnamon
1/4 cup water

1/2 cup quick-cooking oats
1/2 cup all-purpose flour
1/2 cup packed brown sugar
1/8 teaspoon baking powder
1/8 teaspoon baking soda
1/4 cup butter, melted

1. Preheat oven to 350 degrees F (175 degree C).

2. Place the sliced apples in a 9x9 or 8x8 inch pan. Mix the white sugar, 1 tablespoon flour and
ground cinnamon together, and sprinkle over apples. Pour water evenly over all.
3. Combine the oats, 1 cup flour, brown sugar, baking powder, baking soda and melted butter together. Crumble evenly over the apple mixture.

4. Bake at 350 degrees F (175 degrees C) for about 45 minutes. Make sure you check it around 35 minutes to make sure the crust isn't burning.
**If you don't have one of those apple peeler/corer/slicer things, you should totally buy one. They work great!! BBB has them for $20 and Meijer has them this time of year for $20.


Monday, September 14, 2009

Pink Lemonade Cupcakes


I found this recipe and it sounded so cool and I had to make it. The cake turned out really moist and had a great texture... however it just tasted like lemon cake to me. I think this would be WAY more fun with some kind of crazy drink concentrate like fruit punch, blue raspberry, or even margarita or daquiri mix. I will definitely make this again, except only use the concept of the recipe and change it to a different flavor.

Pink Lemonade Cupcakes
Yield: 20 cupcakes

2 c. all-purpose flour
1 tsp. baking powder
1/2 tsp. baking soda
Pinch salt
1 c. granulated sugar
1/2 c. vegetable oil
4 egg whites
2/3 c. thawed frozen Pink Lemonade Concentrate
1/2 c. buttermilk
Pink food coloring

Preheat oven to 350F. Line muffin pan with liners. In a small bowl, combine flour, baking powder, baking soda and salt. Set aside.In a large bowl, whisk together sugar, oil, egg whites and lemonade concentrate. Alternately whisk in flour mixture and buttermilk, making three additions of flour mixture and two of buttermilk, beating until just smooth.Add just enough food coloring to turn the batter a light shade of pink.Scoop batter into liners (fill about three-fourths full). Bake in preheated oven for 20-25 minutes or until tops of cupcakes spring back when lightly touched. Let cool in pan on rack for 10 minutes. Remove from pan and let cool completely on rack. Top cooled cupcakes with frosting (see below).

Lemonade Buttercream
3 c. + 3 Tbsp. confectioner’s sugar
1 stick unsalted butter at room temperature
1/8 tsp. salt
2 Tbsp. pink lemonade concentrate
Milk to reach desired consistency
Pink food coloring

Add the butter, confectioner’s sugar, salt, lemonade concentrate, and a few drops of food coloring to the stand mixer and mix on low using the paddle attachment until combined. Turn the speed to med-high until the buttercream is fluffy and uniformly pink. Pipe or spread onto cooled cupcakes.

**I didn't have a ton of confectioner's sugar so I made it more like an icing rather than a buttercream frosting....just remember to use the milk to thin the frosting rather than adding more concentrate.

Wednesday, August 26, 2009

Oreo Cakes


Conceptually, the oreos had a lot more to do with this cake than they actually did. These still turned out delicious and everyone raved about them at the party I made them for. They were even good and moist for at least a week after. Basically, I wanted to use my mini bundt cake pan so I came up with this idea.


Oreo Cakes
Yield: about 24 cakes

*Cream Cheese Cake
3/4 cup butter softened
1 1/2 cups sugar
1/2 package cream cheese, softened
3 eggs
1 1/2 cups all-purpose flour
1/4 teaspoon baking powder
1/2 teaspoon salt

In a large mixing bowl, cream butter, sugar and cream cheese. Add eggs, one at a time, beating well after each. Add flour, salt and baking powder and mix until combined. Scoop into a large zipper bag and set aside.

*Chocolate Cake
3/4 cup butter, softened
1 1/2 cups white sugar
3 eggs
1 teaspoons vanilla extract
1/2 cup buttermilk
1 cups all-purpose flour
3/8 cup unsweetened cocoa powder
1/4 teaspoon baking powder
1/2 teaspoon salt

In a large bowl, cream together the butter, vanilla and sugar. Beat in the eggs one at a time. Beat in some flour/cocoa/powder/salt then some buttermilk, then flour, then buttermilk etc. Scoop into a large zipper bag and set aside.

1. Preheat oven to 325 degrees. Lightly spray baking spray in a mini bundt pan (If you want to be boring, I guess a cupcake pan could work, but my way is so much prettier!).

2. With your mad Oreo seperating skills, seperate some oreos. Eat the cream and put the cookies in a baggie. You will need about 12 cookie halves at least. Crush the cookies. Sprinkle about a teaspoon and a half into the bottom of each bundt cup.

3. Snip a small hole in the corner of each cake bag. Pipe a ring of cream cheese cake over the oreos. Then pipe a ring of chocolate cake over the cream cheese cake. You want to fill the cups about 3/4 full.

4. Bake about 20 minutes** or until a toothpick inserted into the center of the cake comes out clean. Let cool in pan for 10 minutes, then flip out onto a wire rack and cool completely.

5. Once cool, put some powdered sugar in a bowl and mix in a little milk at a time just until drizzly. Drizzle icing over cakes as desired. YUM.

**Confession. I made these a couple weeks ago and totally forgot how long I baked them for. For some reason 18 minutes is sticking out in my head but I am not sure. So, use your baking judgement!

Elephant Ears

These were really easy, really quick and pretty tasty. I didn't think they were terribly authentic (I did grow up in the town with the world's largest free fair!)... but I think these would make a great dessert component, like with some ice cream or some apple pie filling or drizzled with caramel/chocolate/icing. Imagine the possibilities! Thanks Molly.


Elephant Ears


Ingredients:
* Refrigerator biscuits - 1 roll
* 1 cup cooking oil
* 1/4 cup cinnamon sugar (I made a mix of 1/2 c sugar and 1 tbsp cinnamon)
* Paper lunch bag

Directions: Place cinnamon sugar in paper lunch bag. Heat cooking oil in large (10"+) frying pan. Test for hot enough: Drop of water will sizzle. Separate dough into individual biscuits-"ear". Stretch each biscuit until they just about have holes in them. They do not have to be perfect. Gently drop each "ear" into the hot oil. As soon as one side becomes golden, flip them and let second side get golden. DO NOT WALK AWAY. They burn quickly. Place "ears" on paper towel to soak up excess oil. Shake "ears" in paper bag of cinnamon sugar. Serve warm with ice cream or just plain. Make lots, they will go quickly.

**I just used premade cinnamon sugar and sprinkled it on both sides because I didn't have a paper bag. These really only take like 2 minutes per side. I used regular buttermilk biscuits.

Wednesday, August 12, 2009

Deep Fried Cookie Dough


One time I asked a carnie at a fair who was selling deep fried oreos what the batter was. She said its basically funnel cake batter, you can deep fry anything as long as you coat it in funnel cake batter. So I decided to see if that is in fact true. I would only advise eating this if you are really into the raw cookie dough flavor. I am not so much so I only ate like one or two of these. If you are pregnant or have a medical condition or whatever, you shouldn't eat these because there is potentially raw egg in them... I don't know how well they get cooked thru to make them super safe.

Deep Fried Cookie Dough
Yield: 12-15 balls of gooey-ness

1. Make a standard chocolate cookie dough recipe. Get out your cookie scoop and form about a dozen or so cookie balls and place them on a small tray or baking sheet, don't let them touch. Cover with plastic wrap and freeze solid, at least 2 hours. I am sure you could use the refrigerated cookie dough as well.

2. Make the batter by whisking together the following:
1 eggs
3/4 cup milk
1 cup all-purpose flour
1/2 teaspoon baking powder
1/2 teaspoon salt
1 teaspoon vanilla extract
The result should resemble pancake batter. Adjust the flour as necessary.

3. Heat up your deep fryer. Coat each cookie ball in the batter. If you do not cover it completely the dough will leak out... not good. So coat it well. Drop a couple at a time into the fryer and fry for about 2 minutes until golden. Drain on a paper towel. Sprinkle with powdered sugar if desired.

Friday, July 17, 2009

Cookie Dough Cupcakes


Yep I said cookie dough cupcakes. I saw this recipe and HAD to make it. I read all the reviews and there seems to be 2 complaints: they are dry and the cookie dough cooks instead of being raw dough. Well I fixed the dry problem and think I eventually fixed the raw issue, but I will have to make them again. See the last 2 pictures? The one at the bottom is putting the dough top and center, the one with the hole in it was from me pushing the raw dough into the batter which worked much better. Next time I might try putting the dough in first then the batter.

I didn't use the actual original recipe, just the concept. So here is my version:

Cookie Dough Cupcakes

Yield: 24 cupcakes

Cookie Dough:
Make one recipe Nom Cookies but do not bake them. Instead take a small cookie scoop and fill it just barely full and place on a pan. Repeat 23 more times. Freeze at least 2 hours (I froze them overnight).
Batter:
-1 box Devil's Food cake mix (or whatever flavor you like)
-1 small box chocolate pudding and pie filling (I think it is around 3 oz)
-4 eggs
-1 cup water
-1/3 cup veggie oil

Mix all the ingredients together. Preheat the oven to 350. Line a muffin tin with paper muffin cups. It is probably best to do this in 2 batches of 12 so that the oven will bake properly. Fill each cup 2/3 full of batter. Press a frozen dough ball into the middle of the batter and push all the way down. Or try 1/3 batter, add the dough, 1/3 batter... see if that works better. Bake in the oven for 16 minutes. If you bake it too long, the dough will cook ruining the point of this recipe. Cool for a few minutes before removing from the pan to cool completely. After fully cooling, frost.

Frosting:
1 (8 ounce) package cream cheese
1 cup white sugar
1/8 teaspoon salt
1 teaspoon vanilla extract
1 1/2 cups heavy whipping cream

In a small bowl beat whipping cream until stiff peaks form; set aside. In a large bowl combine cream cheese, sugar, salt and vanilla. Beat until smooth, then fold in whipped cream. You may want to refrigerate this for a little while to try and firm it up a bit. Put a big blog in a Ziploc sandwich bag, cut off a small corner and use it like a piping bag to get the frosting on there.
I really like these cupcakes refrigerated. Plus with the halfway raw dough and the cream cheese frosting, you should probably serve these immediately or refrigerate them anyway.

Monday, June 29, 2009

Apple PB Cookies


These are tasty and almost healthy! You definitely need to eat these within 24 hours or they will fall apart from the moisture content. I actually cut the recipe in half and made like 10 cookies (yes I cut an egg in half haha). I found this recipe at Pennies on a Platter


Apple PB Cookies
Yield: About 2 dozen

1 stick softened butter
1/2 cup granulated sugar
1/4 Cup packed light brown sugar
1/2 Cup creamy peanut butter
1 egg
1 teaspoon vanilla

1 1/2 Cups all purpose flour
3/4 Cup granola clusters (Or Just Bunches cereal, I would add more next time)
1/2 teaspoon baking soda
1/2 teaspoon salt
1 Cup diced apples, about 1/4 inch, I used granny smith

1/2 Cup sugar to roll cookies in

Preheat oven to 350 degrees F. In a stand or electric mixer, cream butter and sugars until light mixed well. Beat in peanut butter until combined then add the egg and vanilla until well combined.

In a large bowl mix together the flour, granola, baking soda and salt. Slowly mix into the wet ingredients following the apples until just combined. With a medium cookie scoop, scoop dough, roll into sugar then place onto a silpat or parchment lined baking sheet. With tines of a fork, press down slightly making an X on top of each cookie. Bake for 8-9 minutes, cookies should look somewhat soft inside when you take them out. Let cool/finish baking out of oven for 5 minutes then transfer to a cooling rack

Wednesday, May 27, 2009

Sauteed Apples

I needed to use up a granny smith apple and I needed a side dish... bingo. With more sugar and cinnamon and a little longer cooking time, this would be an excellent ice cream topping. It is a pretty standard recipe.

Sauteed Apples
Serves: 2


Ingredients:
+1 medium granny smith apple, sliced thinly
+1 tablespoon butter (no substitutes)
+1 tablespoon brown sugar
+4 drops vanilla extract (the real stuff)
+sprinkling of cinnamon

1. In a small fry pan, heat the butter and vanilla until melted over medium heat. Toss in the apples and everything else. Saute for about 5 minutes (or until desired firmness). For a side dish, I recommend cooking briefly unless you like mushy apples.

Monday, May 11, 2009

Mini Pineapple Upside Down Cakes


Molly gave me this suggestion for Easter/mom's birthday. Everyone loved how cute and bite sized these little cakes were. It was a huge pain in the butt having only one 12-mini muffin pan so I suggest having more than that if you plan to do them this size. Yes you can use regular muffin pan size, just increase everything accordingly.... but they won't be this cute and bite sized!

Mini Pineapple Upside Down Cakes
Yield: About 48 cakes?

Ingredients:
2/3 cup packed brown sugar
1/3 cup butter, melted
1 (20 ounce) can crushed pineapple, drained
1 (18.25 ounce) package pineapple cake mix (Duncan Hines has a Pineapple Supreme flavor)
3 eggs
1/3 cup vegetable oil
maraschino cherries, quartered

1. Preheat the oven to 350. In a small bowl, combine the brown sugar and butter; mix well. Spoon a tiny bit into greased mini muffin cups. Place a small piece of cherry in the center of each cup. Spoon a little bit of pineapple around each cherry. Yes mini muffin cups are tiny... so you only need a tiny bit of everything.

2. In a large mixing bowl, combine the cake mix, eggs, oils and mix well. Spoon over pineapple, filling each cup almost full. Bake for 18 minutes or until a toothpick comes out clean. Watch them!! Time may need to be adjusted for the size of the cup.

3. Immediately pop out onto wire racks to cool. This can be messy and you can burn your hand if you don't have mad baking skillz like I have. Yes these will be a bit sticky... what can you expect from sugary pineapply goodness?

**I made one larger cake in my 4" round pan with a full sized pineapple ring and cherry to place in the center of the tray with all the mini cakes around it. Super cute.

Wednesday, April 8, 2009

Mini Cupcakes


I got this idea from the fabulous Bakerella http://bakerella.blogspot.com/ You could spend all day looking at all the amazing things on her blog. She is really talented. These little cupcakes were really easy once I got the hang of it, but wow what an undertaking without any helpers! It literally took me all day to do this plus the night before to bake the cake. Apparently Bakerella visted one other fabulous blogger The Pioneer Woman, which is actually where I found the recipe. http://thepioneerwoman.com/cooking/2009/03/quick-and-easy-cupcake-bites/ These have more of a chocolate covered truffle taste than cake because the cake and frosting combine completely. They are very sweet, very adorable, and quite a lot of work. Try them... if you dare!

1. Bake a box cake according to the directions, 9x13 works fine. I used confetti cake and devils food cake. Red velvet is also recommended.

2. When cake is cool, crumble into a bowl. Mix in about 3/4 can of frosting (cream cheese is recommended). You want the cake to stick together when smooshed.

3. Roll cake into small balls and place on a baking sheet lined with wax paper. I used a small cookie scoop to gauge the size. They need to fit into your candy mold. Refrigerate for several hours.

4. In a small bowl, melt some chocolate brown Wilton candy melts. Microwave for 30 seconds stir, repeat one or two more times as necessary. You don't want to overheat the chocolate. Take a candy mold (the ones that look like Reese's PB cups) and fill half of them with the chocolate halfway. Press a cake ball in and rock it slightly to make sure the chocolate slides up the mold to the top edge all the way around. Repeat with remaining cups. Refrigerate for about 20 minutes until cooled. I recommend getting AT LEAST 2 trays of mold ($2 each), 3-4 is even better.

5. Melt the colored chocolate (directions in my chocolate pretzel entry), about a half bag will work. Carefully pop out each cake ball cup and dip into the chocolate. Press down until the colored chocolate barely touches the brown chocolate cup. Place on a baking sheet lined with wax paper. Place an M&M on top and some sprinkles. Repeat... over and over and over and over (about 50+ times). Put back in the refrigerator to cool completely.

6. Take a nap. You will need one.


Chocolate Pretzels


I had some extra chocolate from the mini cupcakes so Matt was wonderful enough to take little Murray up to 7-11 to grab me some pretzels. I need all the practice I can get for Katie's wedding! These are really easy to make and you can get really crazy with all the stuff you can sprinkle on them. Just a couple notes on a makeshift double boiler:

1. In a small saucepan, heat about an inch to 2 inches of water on low (I used a 1.5-2 on a burner tha goes up to 10). You want some small bubbles to form but you don't want it simmering or boiling. While the pot is still room temperature, place a room temperature pyrex bowl on top.

2. Place a handful of Wilton candy melts (my fave) in the pyrex bowl and stir until melted.

3. Dip the pretzel in and shake off the excess. Put on wax paper to cool. Immediately add sprinkles or whatever if you are going to. It is reeeeally easy if you don't dip 100% of the mini twist pretzels and they look cute. Just hold the bottom and do a scooping motion in the chocolate. Cool completely before removing from the wax paper.

HAVE FUN!

Wheel... of... Fortune!


I had some leftover cake from making mini cupcakes for the baby shower and my mother-in-law's birthday had just passed... hmmm... what to do?? Well, her favorite gameshow is Wheel of Fortune and I happened to see a cool WOF cake... so ta da! I didn't feel like getting out all my pastry bags and tips, so this isn't pristine, but it is super cute and eveyone got a kick out of it. It is a single tier 9" confetti cake with a crumb coat of cream cheese frosting. Then refrigerate to firm up the frosting. Then I mixed a bunch of colors and went to town! Happy birthday Deb!

Lemon Tea Cookies

I got these from fellow blogger http://senoraespanola.blogspot.com/ I needed a non-chocolate dessert for my sister-in-law's baby shower and these sounded perfect and portable. They are definitely that. They are a little on the crumbly side because they are a tea cookie, so don't expect a large gooey cookie. Thanks Ashley!

Lemon Tea Cookies
Yield: 24 cookies

+1/2 cup butter softened
+2 tablespoon granulated sugar
+zest of 1/2 lemon
+2 tablespoons lemon juice
+1 1/4 cup flour
+1/4 teaspoon baking powder
+1/8 teaspoon salt

Icing

+1/2 cup powdered sugar
+juice of 1 lemon

In medium mixing bowl, combine flour, baking powder, salt, and whisk to combine well; set aside. In bowl of stand mixer, combine butter, sugars, lemon zest and beat in high until light and fluffy, about 5 minutes. Add lemon juice and beat to combine well. Turn mixer to low and slowly add dry ingredients. Slowly turn mixer up to medium to incorporate all the of the dry ingredients into the dough (this will take a couple minutes, but it will come together well - if you live in a dry climate, you can add 1 Tbsp water to make it come together). Remove bowl from mixer and roll cookie dough into 1-inch balls (no bigger) I used my small cookie scoop filled completely but no more, it was perfect. Place cookies onto a large plate or cookie sheet and place into fridge for 30 minutes. Preheat oven to 375 degrees and line two baking sheets with parchment. I only used one sheet lined with a silpat mat and I fit 24 cookies. Remove cookies from fridge, place on lined baking sheets and place into oven to bake for 10-12 minutes (do not cook anymore - they may look underdone but they are not, do not them them brown). Remove from oven and let cool on cookie sheets.Once cooled, make icing by placing powdered sugar in a small bowl and, add 1 Tbsp of lemon juice. Stirring constantly, add additional 1/2 tsp lemon juice at a time until icing just comes together and is barely pourable. I added one small dot of yellow food coloring. Using a spoon, drizzle a small amount of icing over each cookie and let run down sides. Garnish with zest of lemon, if desired and serve.