Thursday, July 24, 2008

Dove Brownies


These were yummy =) I usually prefer my brownies a little fudgier, but these turned out great when Matt had a brownie craving.

Dove Brownies
Serves 9

3/4 cup butter, melted
1 1/2 cups white sugar
1 1/2 teaspoons vanilla extract
3 eggs

3/4 cup all-purpose flour
1/2 cup unsweetened cocoa powder
1/2 teaspoon baking powder
1/2 teaspoon salt
9 Dove Promises Caramel Chocolates

1. Preheat the oven to 350 degrees. Grease an 8x8 pan.
2. In a large bowl, blend melted butter, sugar, and vanilla. Beat in eggs once at a time. Combine in a seperate bowl teh flour, cocoa, baking powder, and salt. Gradually blend this mixture into the egg mixture. Spread the batter into the prepared pan.
3. Bake in the preheated oven for 25 minutes. Take out and press the unwrapped chocolates into the brownies. Put back into the oven for about 15 minutes. Brownies are done when they begin to pull away from the sides of the pan.
4. Let the brownies cool and cut into squares. Enjoy!

Tip: Brownies are easily cut with a plastic knife! Try it!

Monday, July 14, 2008

Shelly's Famous Potatoes


Ok so these aren't exactly famous, but they are so good they should be! We make these every time we grill and they have been delicious every single time. Try them, you won't regret it!


Shelly's Famous Potatoes
Serves 4

-5 cups chopped red potatoes (about 5 large)
-1/2 cup diced red bell pepper
-1/3 cup diced green bell pepper
-1/2 cup diced sweet onion
-1 teaspoon garlic salt
-1/2 tablespoon montreal steak seasoning
-4+ tablespoons butter or margarine
-Foil


1. Lay out about 2 feet of non-stick foil or non-stick sprayed regular foil.

2. Wash & scrub red potatoes clean. Chop up potatoes into bite sized pieces and place in single layer onto center of foil.

3. Dice peppers and onion and sprinkle onto potatoes, toss with hands if necessary.

4. Place little chunks of butter or margarine over top, space out as necessary.

5. Sprinkle garlic salt and steak seasoning evenly over mixture (amount may be adjusted to taste). We are not shy with either of them in my house!!

6. Fold foil up over the mixture, covering everything. Take another piece of foil and wrap in opposite direction to make sure the packet is leak-proof.

7. Place on grill at medium heat (about 350-400 degrees) for 35-45 minutes (flip over packet halfway through cooking), depending on your grill and your potato firmness preference.

8. Cut open foil pouch and serve, careful of the steam!

**Note: If there is not enough butter or you cook the potatoes too long they will stick/burn to the foil. Better luck next time!

Thursday, July 10, 2008

Chicken Crescents


dice . . . . . . . . . . . . . . . fold


bake. . . . . . . . . . . . . . . . . eat

This is a great recipe I got from my future mother-in-law. We have modified it a bit, but it is basically the same yummy deliciousness! I mean, with cream cheese in it.... it has to be good! Remember the Shelly Rule? I served these with corn on the cob and grapes. Yum!


Chicken Crescents
Serves 4

You will need:
Oil, cream cheese, chicken, onion, salt & pepper, garlic, cream of chicken soup, sour cream, milk, parsley, 8 count refrigerated crescent rolls.

1. In a fry pan, add a little oil and heat over medium. Take out a half a block (4 oz.) of cream cheese (reduced fat/fat free is fine) and put it in a medium bowl to soften.

2. Add 1 cup of diced onion (vidalia is my favorite) and about 2/3 pound chicken meat. I used tenders this time. Try not to move the chicken around much. Cook it for about 3-4 minutes on the first side and add salt and pepper. Then flip and repeat. When you flip, add a clove or two of minced garlic. I use the jar stuff because I am too lazy to mince/press it myself.

3. When chicken is done, remove from pan to a cutting board to cool slightly.

4. Preheat the oven to 350 degrees, or whatever it says on the crescent roll package.

5. Layout the crescent rolls on a baking sheet. (see picture)

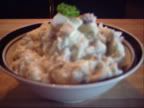
6. Finely dice chicken mixture and add to the cream cheese in the bowl. Mix.

7. Spoon a large scoop of the mixture onto the fattest part of each crescent roll. Then fold up the short corners. Then fold up and wrap around the long corner. Don't worry if the chicken peeks out.

8. Pop in the oven per crescent roll directions (usually 11-13 minutes). They will probably be done in the shorter amount of time.

9. While baking, in a small saucepan over low heat combine the following:

  • 3/4 can of cream of chicken soup
  • 1/2 cup sour cream
  • Few splashes of milk
  • Palmful of dried parsley
10. When crescents are done, spoon some of the sour cream sauce onto a plate. Set 2 crescents on top of the sauce (it looks prettiest this way haha). Enjoy!

Green Bean Casserole

This goes with the chicken-n-stuff meal. This is the pretty standard recipe on the back of most labels.


Green Bean Casserole
Serves 4


1. When you have about 40 minutes left on the chicken, take out a pan around 8x8 size.
2. Open and drain 2 cans of french style green beans and put into pan.
3. Put a whole can of cream of mushroom soup and a few splashes of milk onto the beans until you can get it mixed and creamy.
4. Get crazy with the salt and pepper.
5. Optional: Tear up 2-3 slices of american cheese or a few small cubes of velveeta and mix them in.
6. Bake for 30 minutes. Take out and add French's French Fried Onions to the top and pop back in for 5 minutes.

Chicken-n-Stuff(ing)


Mmmmm... chicken-n-stuff. This is a household favorite! It is one of the few things I will eat leftover too. There are a lot of versions of this out there, but I think I have perfected this one to our liking. Hope you like it too.


Chicken-n-Stuff(ing)
Serves 3


1. Preheat oven to 350 degrees.

2. Take out an 8x8 or 9x9 pan. Place about a pound of chicken breast meat in the bottom. I use whatever I have around... tenders, thin sliced breasts, regular breasts. Just adjust the cooking time accordingly. I used regular breasts this time.

3. Cover chicken with about 4 slices of provolone cheese.

4. In a bowl, stir together 1 can of cream of chicken soup and about a 1/2 cup of milk. It shouldn't be thin and runny. Spoon over top of cheese covering everything.

5. In a bowl melt a stick of margarine, yes the whole stick. Then stir in 2 cups of Stouffers Stuffing Mix. Either the Savory Herb or the Traditional Sage variety are best. Sprinkle mixture over top of the soup.

6. Bake until chicken is fully cooked. For regular breasts, this is usually at least an hour. Caution: If you are cooking this dish for more than 45 minutes, please cover it with foil for the first 20 minutes or so.... or else your stuffing will burn and be too crunchy.


This meal goes excellent with Green Bean Casserole, which I will post next.

Chili Cheese Dip


This is one of my all time favorite things to feed my guests! So easy and addicting. I brought this to a get together night and forgot to take a picture.... but a cheesy spoon laying next to the crock pot is the most common sight to see with this recipe, so this picture is only appropriate.


Chili Cheese Dip
Serves 12-15

1. Get your crock pot heating up on high.

2. Throw in the following:
  • 1- 8oz bar of cream cheese, reduced/fat free works too
  • 1 can of Hormel Hot no bean chili
  • 1-16 oz. jar of your favorite salsa
  • 1- 2 pound brick of Velveeta, cubed

3. Stirring occasionally, heat until melty and combined. Warning, this could take an hour.

4. Reduce heat to low and serve with tortilla chips (2 regular sized bags). Make sure you set out a paper plate for the spoon, this gets messy!

Boyscout Pizzas


These are so easy I am almost embarassed to blog about them! Matt used to eat these in boyscouts and I remember them from being a kid. Every once in awhile we get a craving for them. I really like to make them because they can bake in the toaster oven, my favorite kitchen appliance! So nice when it is hot out and you don't want to heat up the oven.


Boyscout Pizzas

1. Preheat toaster oven to 350 degrees.

2. On a toaster oven pan, split 2 or 3 (however many will fit) english muffins and lay on pan.

3. Spread on a couple spoonfuls of your favorite pizza or spaghetti sauce.

4. Add lots of shredded mozzerella cheese.

5. Dice up whatever toppings you like. Smaller pieces are better when working with a small pizza! We used pepperoni, onion, green and red peppers, and mushrooms. Basically anything you want. Sprinkle the toppings on.

6. Add a little more sauce on top and sprinkle with a little extra italian seasoning.

7. Bake until melty and crunchy... about 10 minutes.


Serves: 2 halves per person.

Thursday, June 26, 2008

Taters for Two


So I cheated a little tonight... prepackaged pot roast, canned beans and canned pineapple. But I redeemed myself by making homemade mashed potatoes... mmmmm. If you can make one really good homemade side, it really saves an otherwise ordinary meal. I didn't have a recipe, I kinda made this one up, so all the measurements are approximate (as in I didn't measure anything).

Redskin Mashed Potatoes
1. Grab a pot, fill it halfway with water, start it boiling.
2. Scrub and cut up 3 large redskin potatoes into bite sized chunks (leave the skins on!). When the water is boiling, add the potatoes, a little oil, and some salt. Boil for about 12-15 minutes. I usually pop one in my mouth to see if they are ready. You want them tender but not mushy.

3. Meanwhile, in a large mixing bowl, throw in:

  • 2 oz. cream cheese
  • 2-3 spoonfuls of sour cream
  • 3 tablespoons stick butter
  • 1 palmful of dried parsley
  • 2 cloves minced garlic, or garlic from a jar
  • about a teaspoon of garlic salt
  • a few good dashes of black pepper

4. When the potatoes are finished, drain them into a colander and then put them back into the empty hot pan momentarily to get rid of excess water droplets. Then throw them into the mixing bowl. Bust out the trusty hand mixer and beat the mixture on low until combined. Then add a little splash of milk and mix. Repeat with the milk until they are the consistency you desire. I prefer my potatoes on the thick side.

5. Tada! Transfer directly to a plate or keep warm in a oven safe bowl in the oven. Eat them plain or with some gravy. Hope you like them!

Shelly Rule: Does your recipe suck? Chances are it is minced garlic, garlic salt, or cream cheese. I haven't met a recipe I didn't like that contained cream cheese!!! And there is no such thing as too much garlic. =)

Monday, June 23, 2008

Crockpot Salsa Chicken


This recipe comes compliments of my knottie friend, MrsLaurenandJustin. It is super simple and smells wonderful! Matt is not a huge Mexican food fan, so I toned down the seasoning. Also, I thought I had a packet of Mexican rice mix in the pantry... I was wrong... so I just threw some stuff together. It wasn't too bad.

Crockpot Salsa Chicken
Serves 4
1. In a crockpot:

  • Add 4 FROZEN chicken breasts (I had 2 super huge ones)
  • Sprinkle 1 packet taco seasoning over the chicken (I used half)
  • Mix together 1 cup salsa and 1 can cream of chicken soup and pour over chicken

2. Cook on low for about 8 hours. Mine ended up being in for closer to 11 and it was fine, I love crock pots!

3. When you get home from a long day at work, figure out your side dish and start making it. Below is the recipe for the rice I made with it. Once the side dish is almost done, add 1/2 cup sour cream to the crock pot and mix in. Also, break up the chicken into shreds, it should just fall apart. Let it sit for a couple minutes while the sour cream warms.

4. There are many ways you could serve this... by itself, over rice, in a tortilla, with tortilla chips... I chose to pile it onto a store bought tostada and sprinkle on a little cheese and a dab of sour cream... and a couple jalapenos. Mmmmm. Thanks Lauren!!

Mexican Rice

1. Prepare 1 package of Rice-a-roni chicken flavor rice per directions except:

  • Add a handful of diced onion and half a diced jalapeno to the browning of the rice
  • Reduce the water by 1/2 cup
  • Add 3/4 cup salsa and 1/2 cup canned corn when you add the water

2. Watch it carefully to make sure it doesn't stick/burn due to the reduced water. It depends on the liquid content of your salsa.

3. Enjoy.

Chicken Croquettes


Mmm, Matt gave these 2 thumbs up! We had just gotten home from a long day and had no idea what was for dinner. There wasn't much in the fridge so this is what I came up with. The side dishes are nothing special, just mixed veggies and some pineapple.

Chicken Croquettes
Serves 4
1. Splash a little olive oil into a large pan on medium high heat and add:

  • About a pound of fresh chicken (I used 9 chicken tenders)
  • About 1.5 cups of diced onion
  • Salt and pepper

Cook chicken for a couple minutes each side until no longer pink in the middle and the onions begin to caramelize.

2. Meanwhile, in a large mixing bowl:

  • Lighly beat 2 eggs
  • Mix in 1 cup italian seasoned bread crumbs
  • 1 tablespoon dried parsley
  • 1 teaspoon garlic salt
  • 1/2 teaspoon black pepper
  • 1/2 teaspoon italian seasoning

3. Once chicken and onions are done, remove to your cutting board to cool a bit. Then with a big ol' knife, finely dice the mixture and add to the egg/bread crumb mixture.

4. Stir the whole mess together. If it appears to be too dry and won't stick together, add another lightly beaten egg. If it is too wet, add a little bit more bread crumbs. Divide into 10 balls-o-chicken.

5. Back to the same pan over medium to medium-high heat, add a little more oil, but this time veggie oil. Maybe a tablespoon or two. If you flick a LITTLE bit of water into the pan and it sizzles, you know it is ready. Careful, it might splatter and burn you. Now place 5 chicken balls into the pan and press down a bit with a turner. Fry for about 3-4 minutes until browned. Then flip and repeat. Remove the patties to a plate and pat with a paper towel to remove excess oil. Repeat with the other 5 chicken balls, adding a smidge more oil if necessary.

6. Tada!!! Now enjoy with your favorite side dishes. There will probably be leftovers. I am willing to bet they would be great on top of a salad.

Saturday, June 21, 2008

My Cooking Blog

Here are some things you should know about me as a "chef":

1. I have "Shelly's Rules". I will throw these out at random. They are kinda like those beer commercials with the "Man Laws".

2. I don't really like to measure things. So if you see a recipe with "about" or "approximately"... you really don't have to be exact. A lot of times I use the "until it looks right" approach. Hopefully that won't frustrate you. I once heard that "Baking is a science, and cooking is an art". That basically means that you do have to measure correctly for baking, so I will try to be specific in that area.

3. I am wordy. I throw out lots of comments in my recipes, like preferred brands of products. I hope it helps someone.

4. A lot of my recipes aren't 100% homemade. I work full time, I don't have time to be Suzy Homemaker... so I like the semi-homemade approach.

5. I am really picky. You won't see a huge variety of recipes on here. Matt and I generally don't eat seafood, and I am not into a ton of red meat. But if you like starches and desserts, I'm your gal!

Matt's Favorite Cookies


My fiance Matt loves chocolate chip cookies. It took me forever to find/modify the perfect cookie recipe to meet his standards. This is actually a half recipe, so it obviously could be doubled. He absolutely devours these cookies!

Chocochip Cookies

Yield: 15 cookies


1. Set out a stick of unsalted butter to soften ahead of time. In a pinch you can microwave the stick very quickly (like 10 seconds) to soften it. But if you melt it, the consistency of the cookies will change.


2. Preheat the oven to 350.


3. In a large mixing bowl, with a hand/stand mixer cream together the following:


  • 1 stick softened (1/2 cup) UNSALTED butter (not margarine)

  • 1/4 cup granulated white sugar

  • 3/4 cup packed light brown sugar

  • 1 egg

  • 1 1/2 teaspoons real vanilla extract (don't mess with that imitation crap)

4. In a small bowl, sift/mix together the following:


  • 1 1/4 cup all-purpose flour

  • 3/8 teaspoon salt (I prefer kosher for baking)

  • 1/2 teaspoon baking powder

  • 1/2 teaspoon baking soda

5. Slowly beat the dry ingredients into the wet.


6. Stir in about 9 ounces (3/4 of a bag) chocolate chips. I like to mix half semi sweet and half milk chocolate. I think it really 'makes' the cookie.


7. Scoop dough onto an ungreased cookie sheet. Make sure there is about 2 inches between each ball.


8. Bake for approximately 9 minutes, depending on how you like your cookies. Matt prefers his cookies on the (super) soft side. Cookies are done when the edges are lightly browned and still appear moist in the middle.


9. Take pans out and let cookies cool on the pan for 2-3 minutes. Then remove the cookies to a cooling rack, countertop, wax paper, whatever to cool completely... or at least until they are cool enough to devour with a big glass of milk! Enjoy!


Welcome!

Hello. I have finally given in and started a blog. I suspect this will be mostly a food blog, but we shall see. Currently I have a ton of projects going on because I am getting married in September, so I am not sure how often this will be updated in the next couple months. But after the wedding I am sure I will need something new to occupy my time, so I will probably go back to cooking. Check back for updates, I will do my best. Thanks for visiting!

Disclaimer: I do not have the best digital camera in the world, so be patient until I can get a new one.